The mission of DNS (Domain Name Resolution System) is to serve the bottom layer of content related to domain names. Is the core component of a domain name (eg example.com). The vast majority of things related to domain names are inseparable from it. for example:- Visit a website, usually by entering a domain name (eg
https://www.example.com) - Send mail,
@ is followed by the hostname, which is usually a domain name (eg webmaster@example.com)
The entire DNS has layers of complexity, which can be confusing to people who are just starting out buying domain names. This article will introduce the working principle of DNS in detail, which is helpful for a deeper understanding. This article will cover:
- How to resolve a domain name on the client
- How to resolve a domain name level by level on the DNS cache server
Also includes:
- Classification of Domain Names
- What is a Glue record
- Why can’t CNAME be set on the primary domain name?
Let’s start with the local DNS.
Local DNS
Local DNS is much simpler than global DNS. So let’s start with the local DNS. 127.0.0.1 is often used as the loopback IP, which can also be used as the IP address used by the machine to access itself. Usually, this IP address corresponds to a domain name, called localhost. This is a first-level domain (also a top-level domain), so it’s the same level as com. How does the system map localhost to 127.0.0.1? In fact, it is through DNS. In an operating system, there is usually a hosts file that defines a set of domain name to IP mappings. Common hosts file contents are as follows:
127.0.0.1 localhost::1 localhost
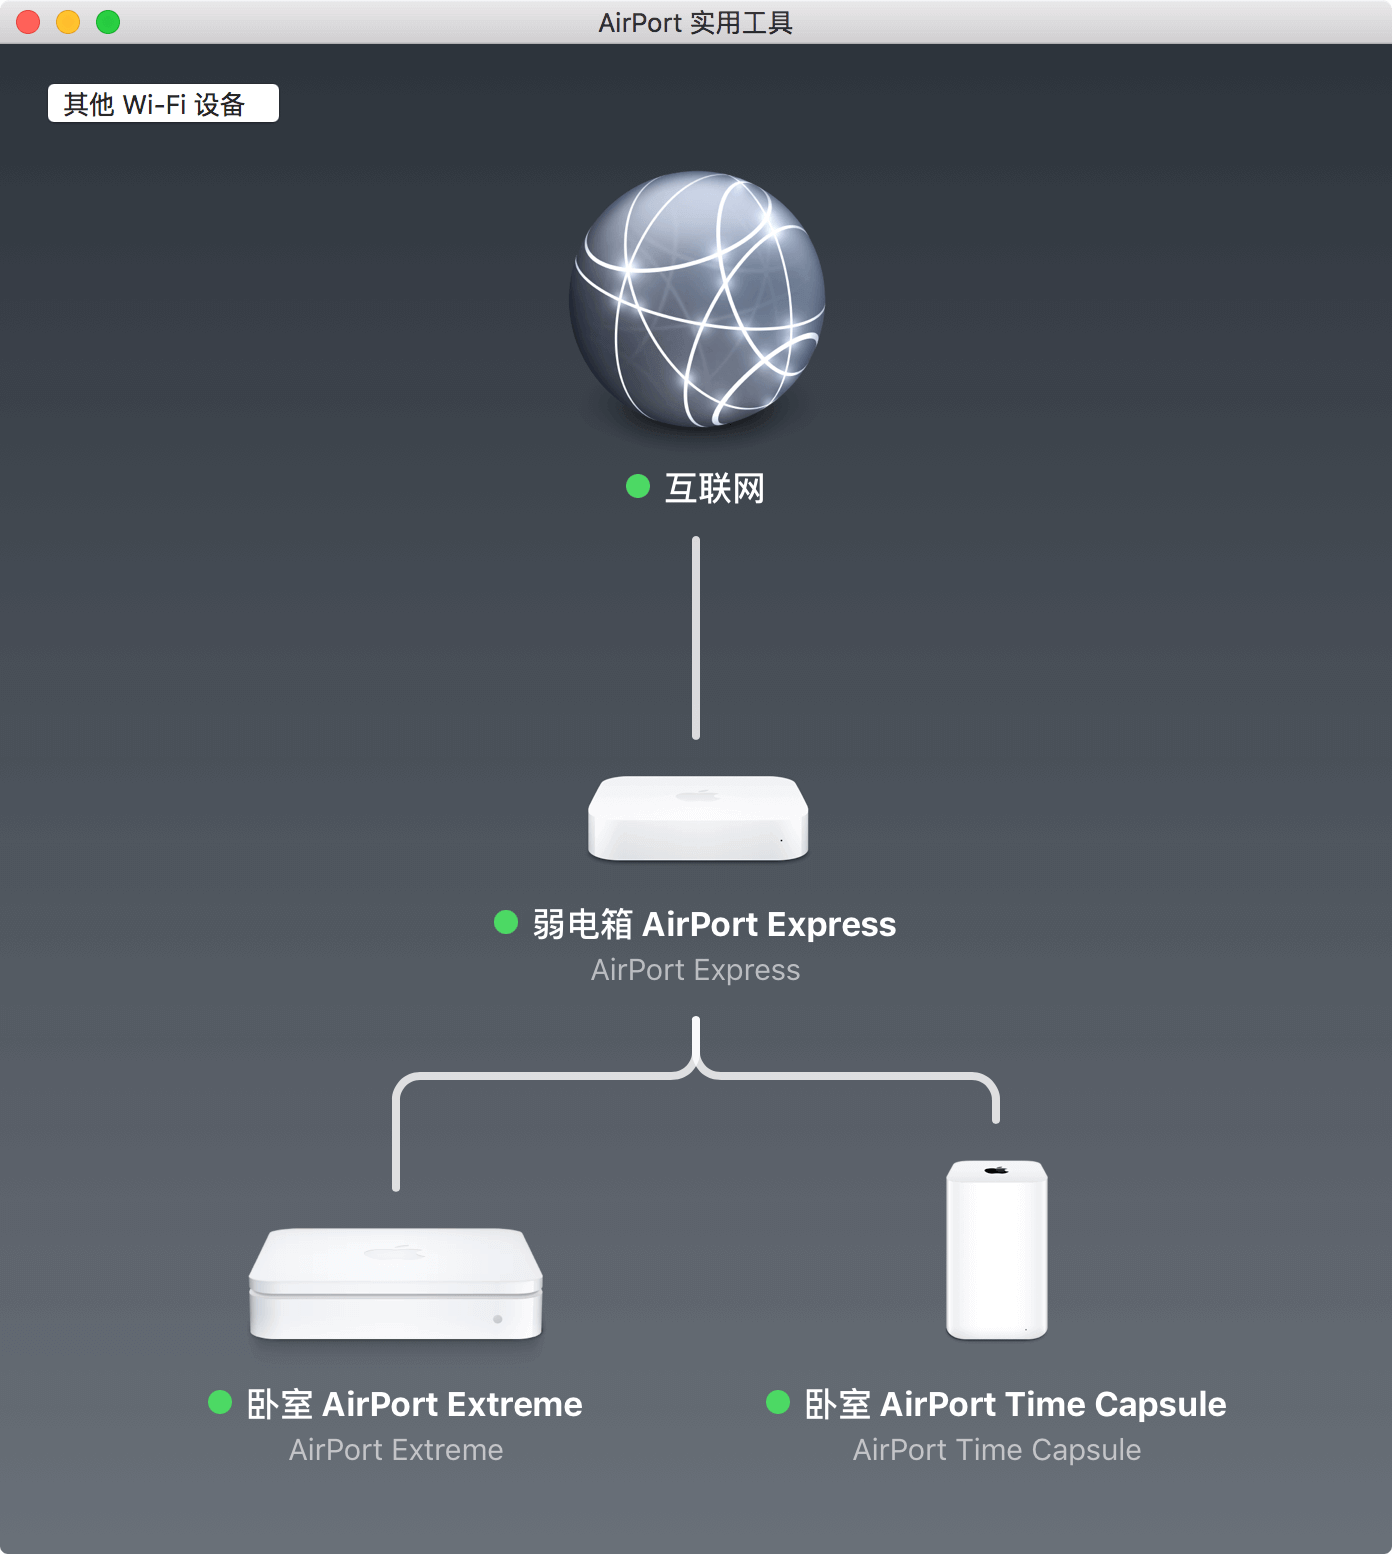
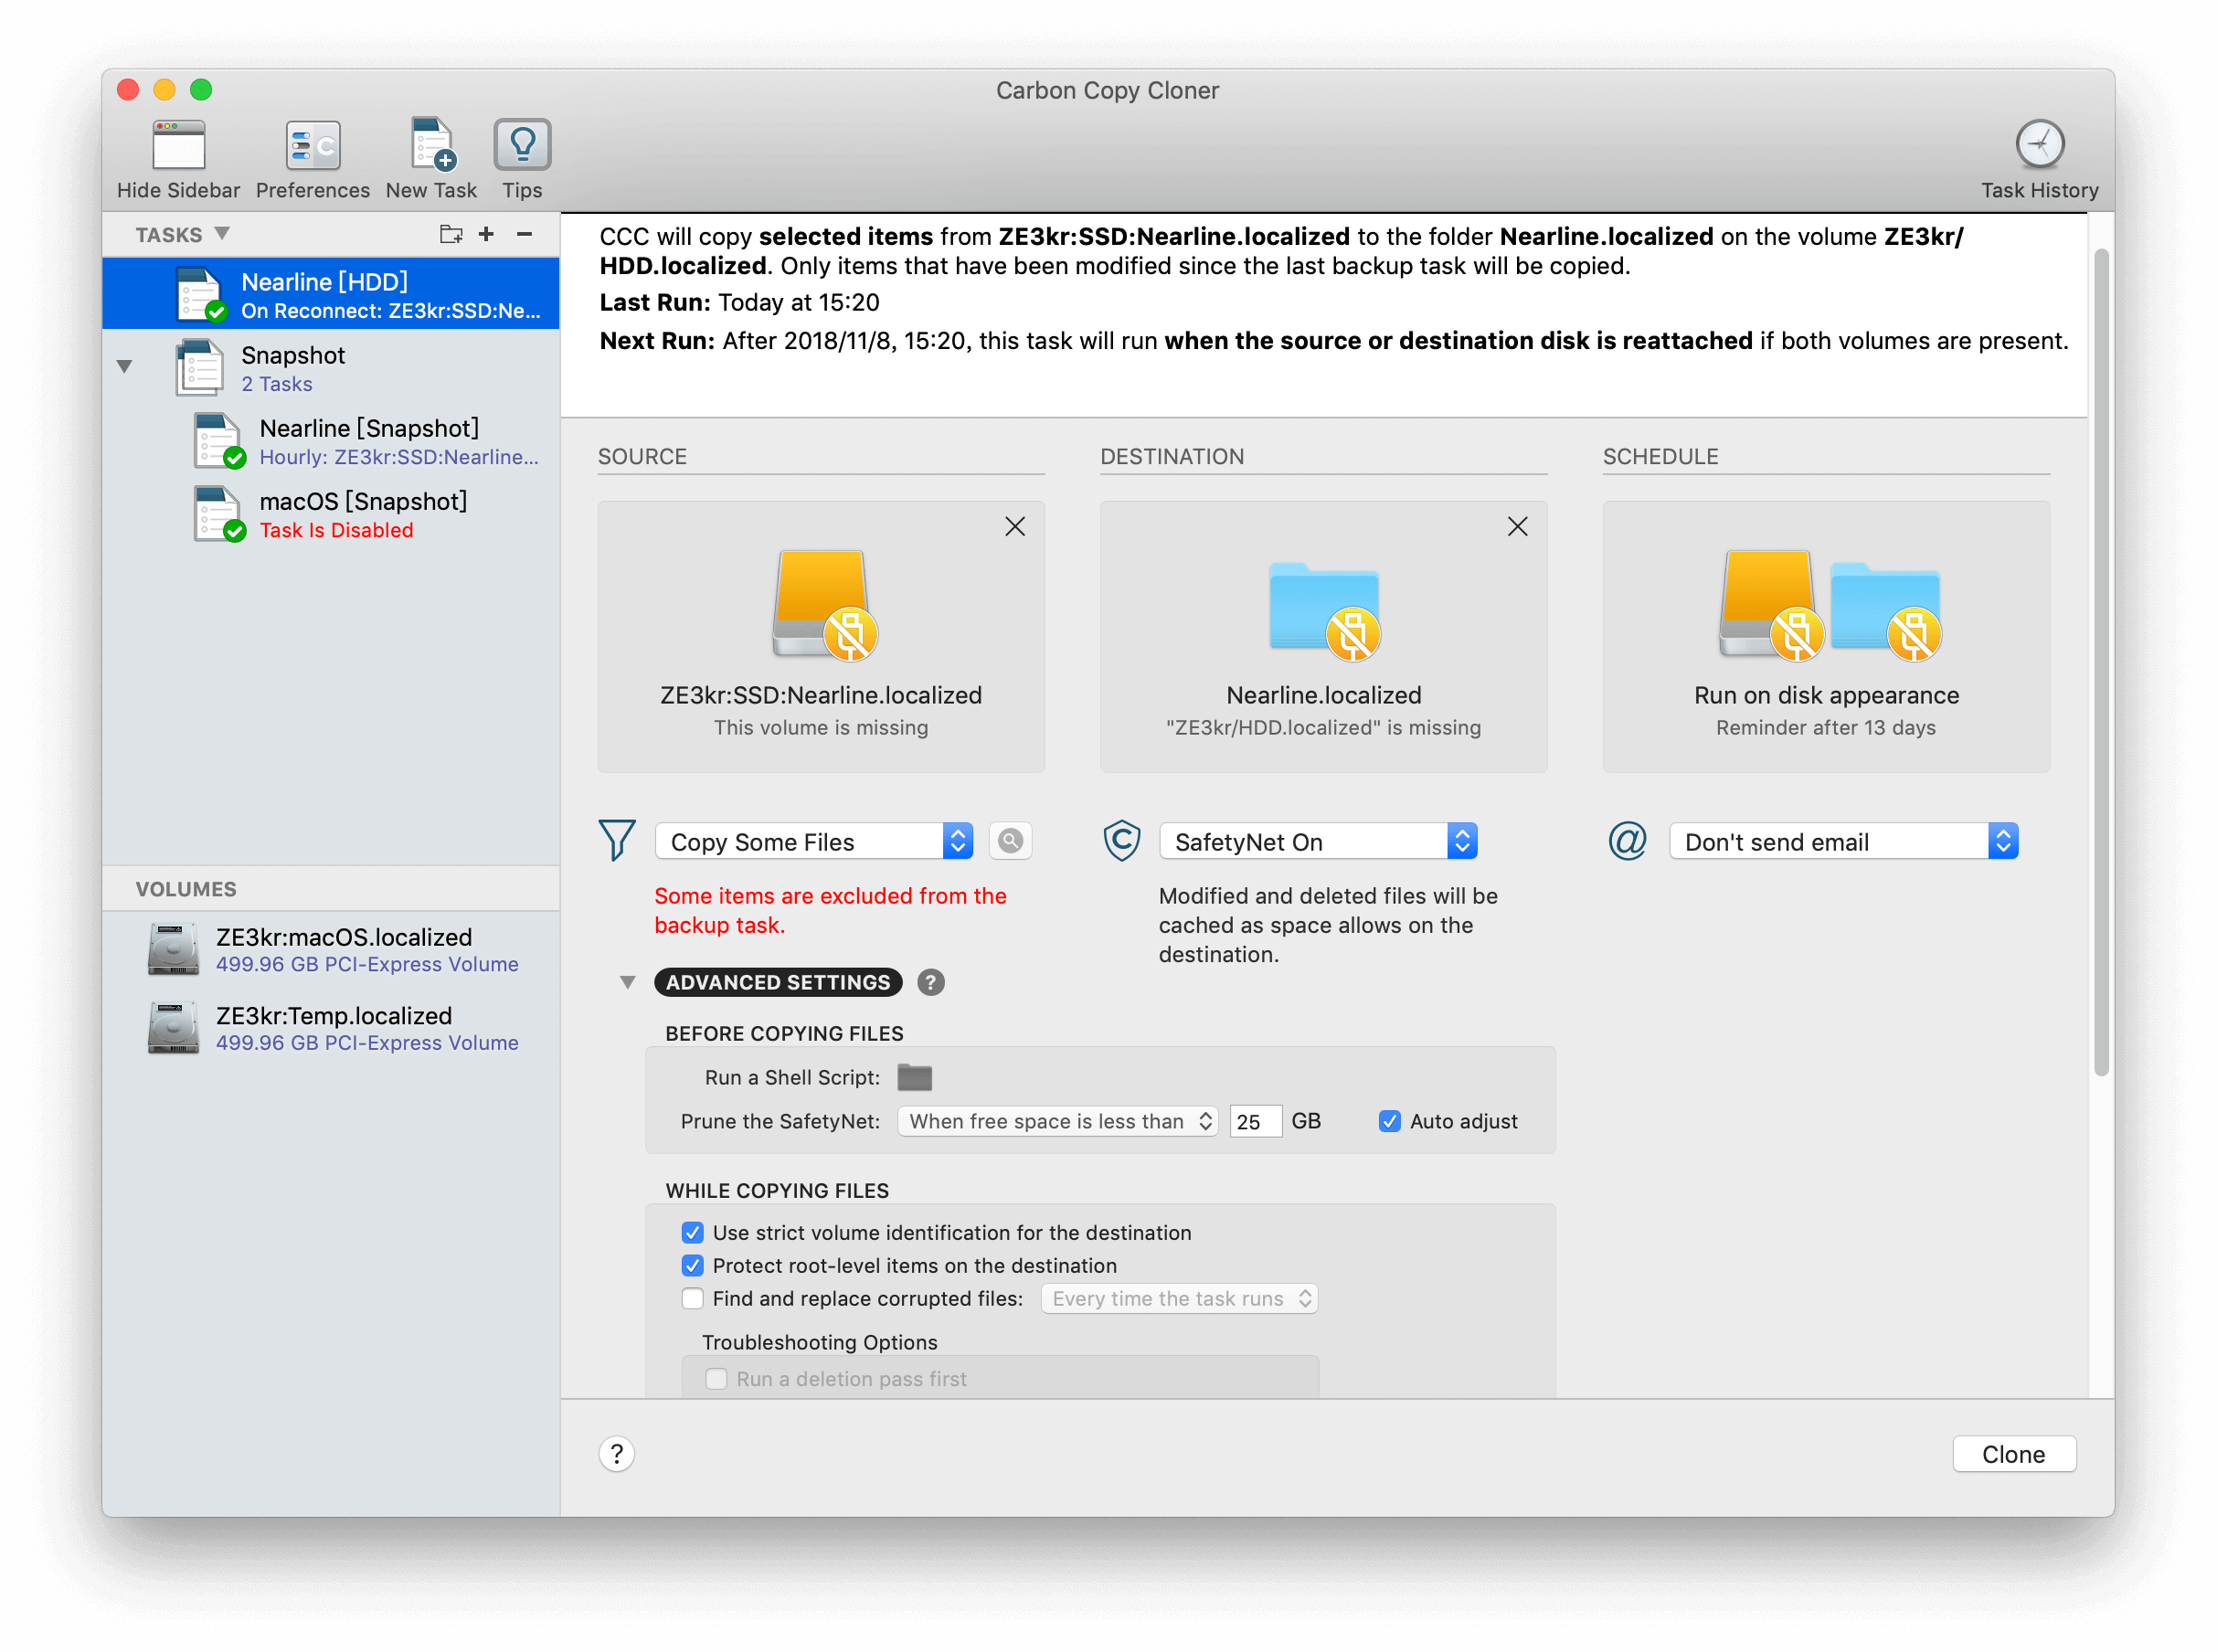
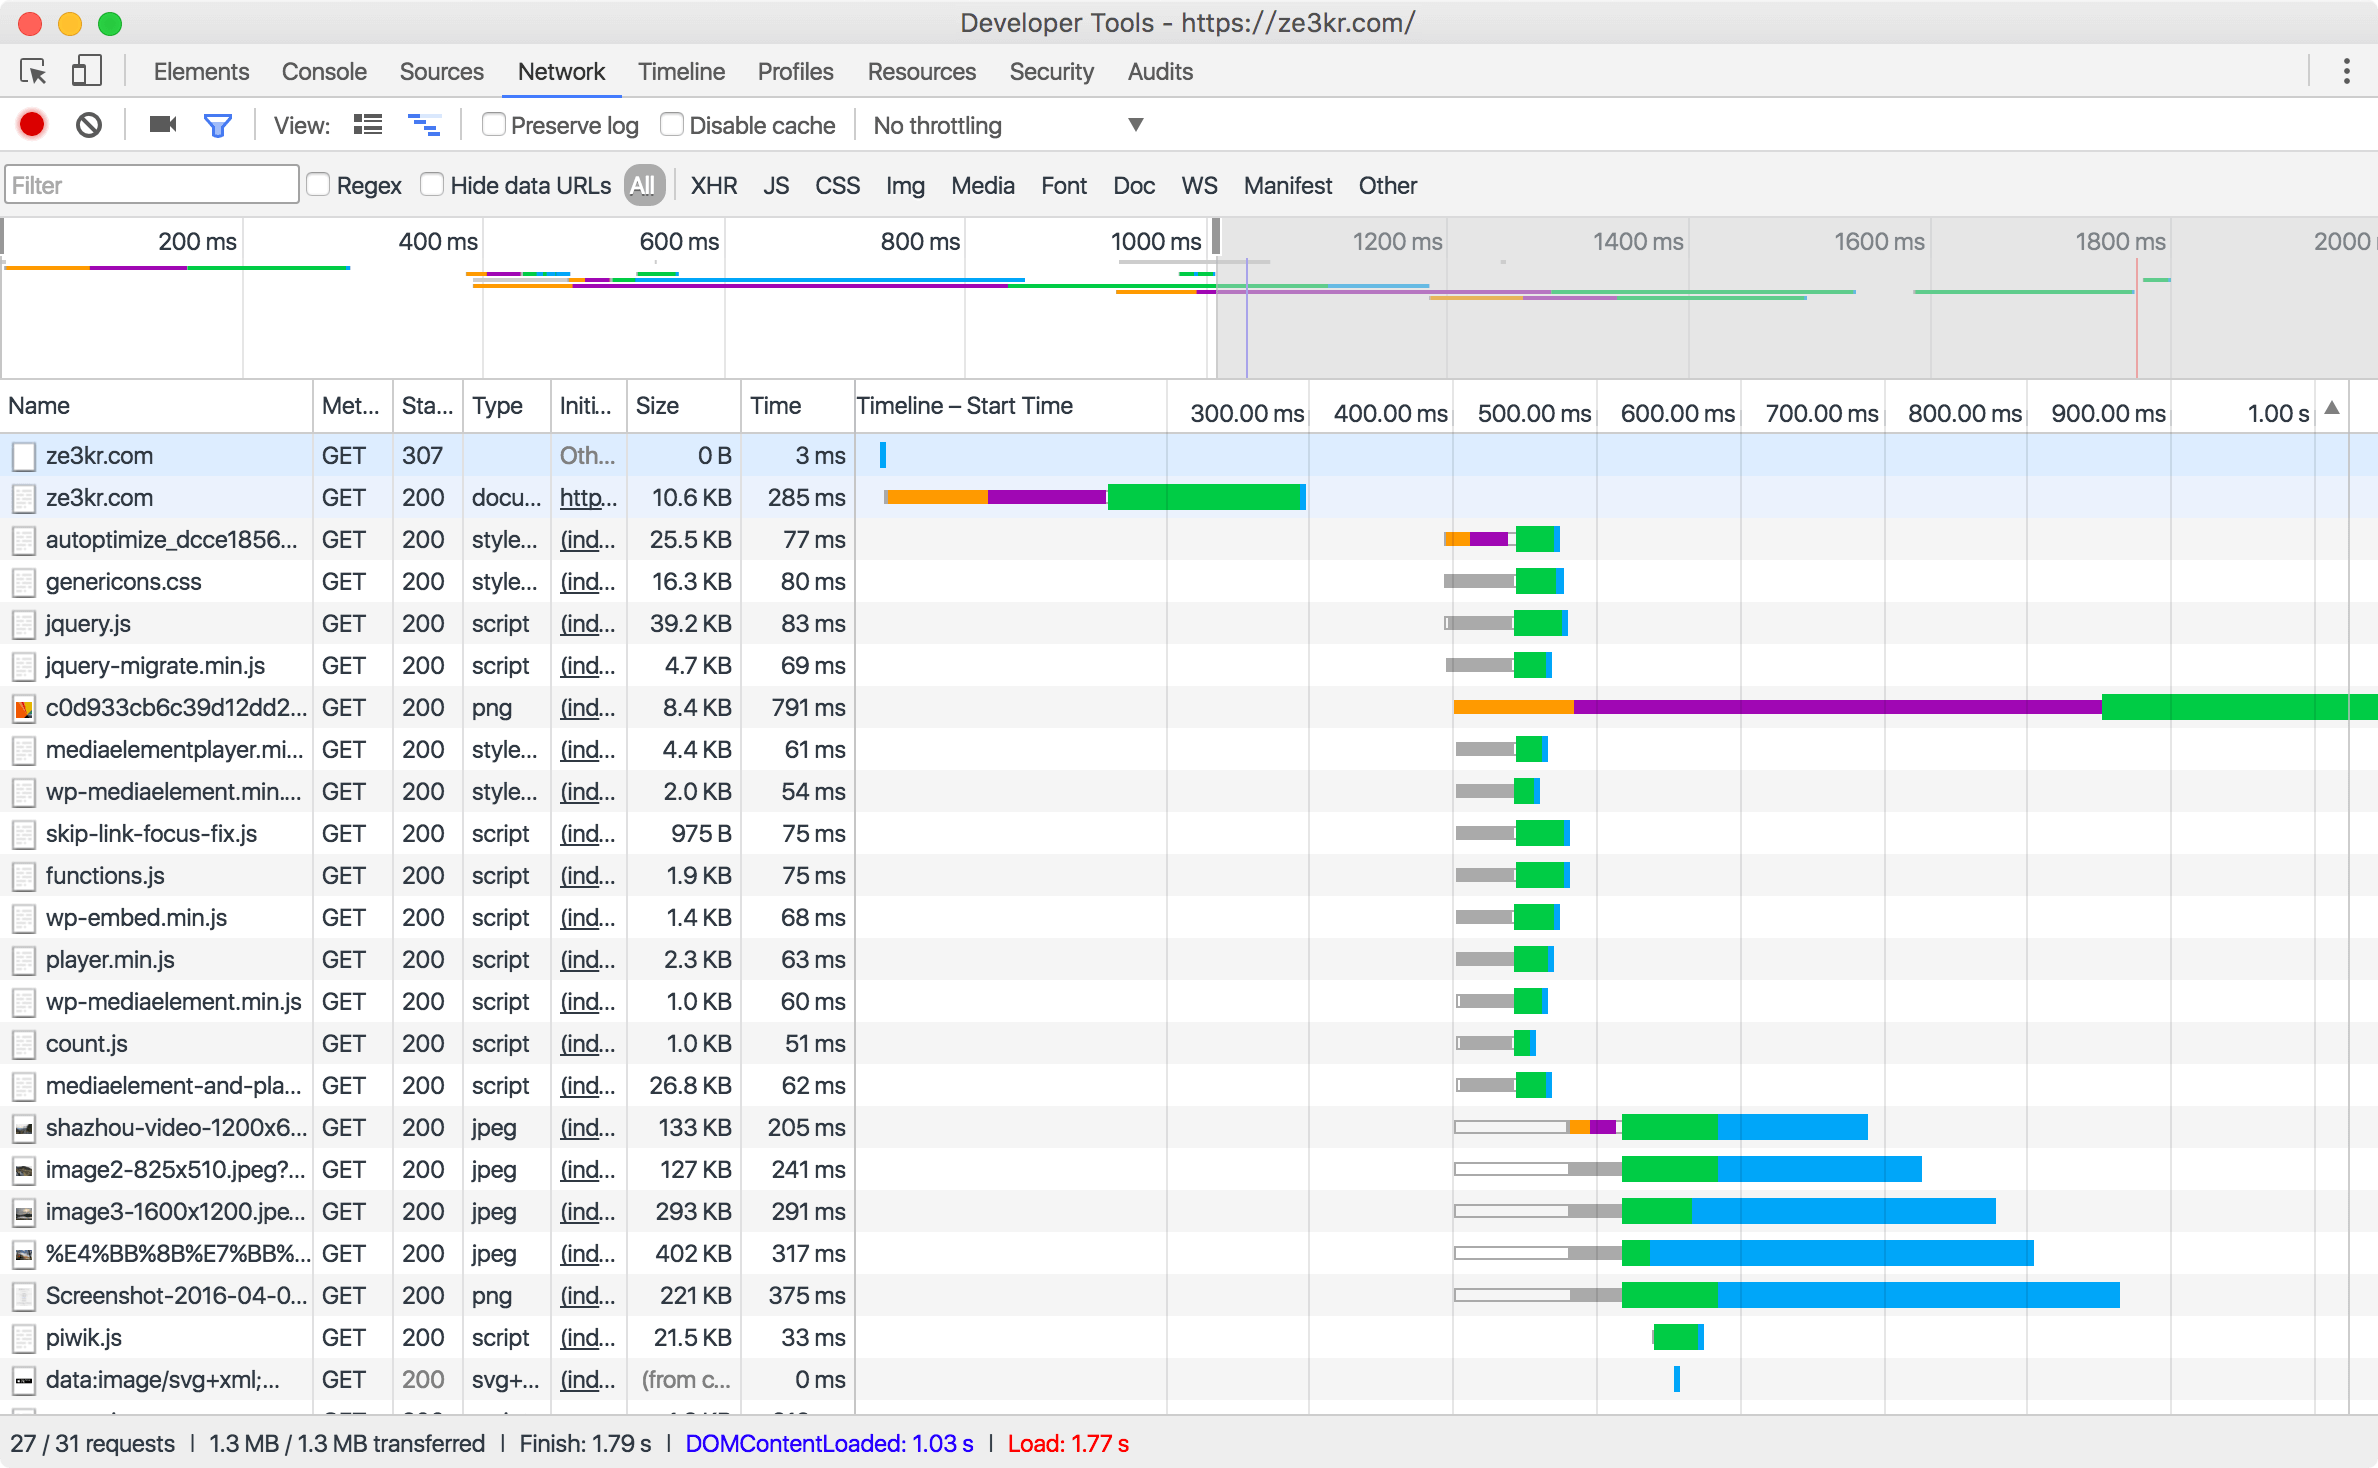
It defines the localhost domain name corresponding to the 127.0.0.1 IP (the second line is the IPv6 address). In this way, when you visit this domain name from a browser, or execute Ping in the terminal, it will automatically query the hosts file, and get the IP address from the file. In addition, the hosts file can also control the IP address corresponding to other domain names, and can override its value in the global DNS or the local network DNS. However, the hosts file can only control local name resolution. When the hosts file appeared, there was no DNS, but it was arguably the predecessor of DNS. If you need to share the same DNS in a network, you need to use IP packets to obtain DNS records from a server. In a network (here mainly refers to the local network, such as all devices connected to a router in a home and the network composed of this router), there will be many hosts. When communicating with these hosts, it is more convenient to use a domain name. Typically, devices connected to the same router are set to one of the router’s own DNS servers. In this way, the resolved domain name can be obtained not only from hosts, but also from this server. Get DNS records from another IP through DNS query. DNS query is usually based on IP data packets such as UDP or TCP to achieve remote query. My PC’s network configuration is as follows, which was set up automatically after my PC was connected to the router:
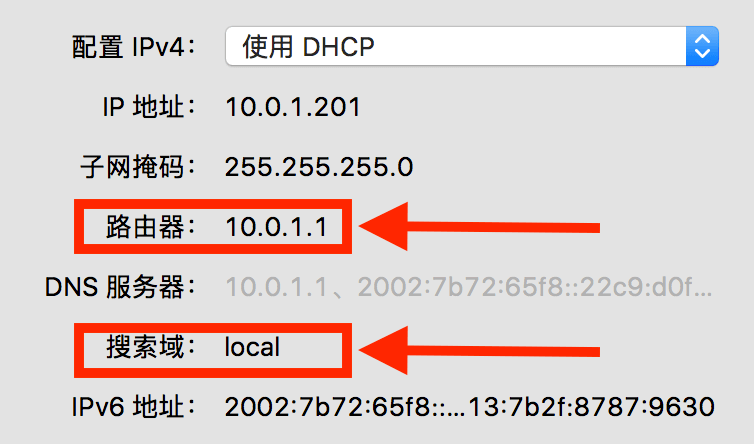
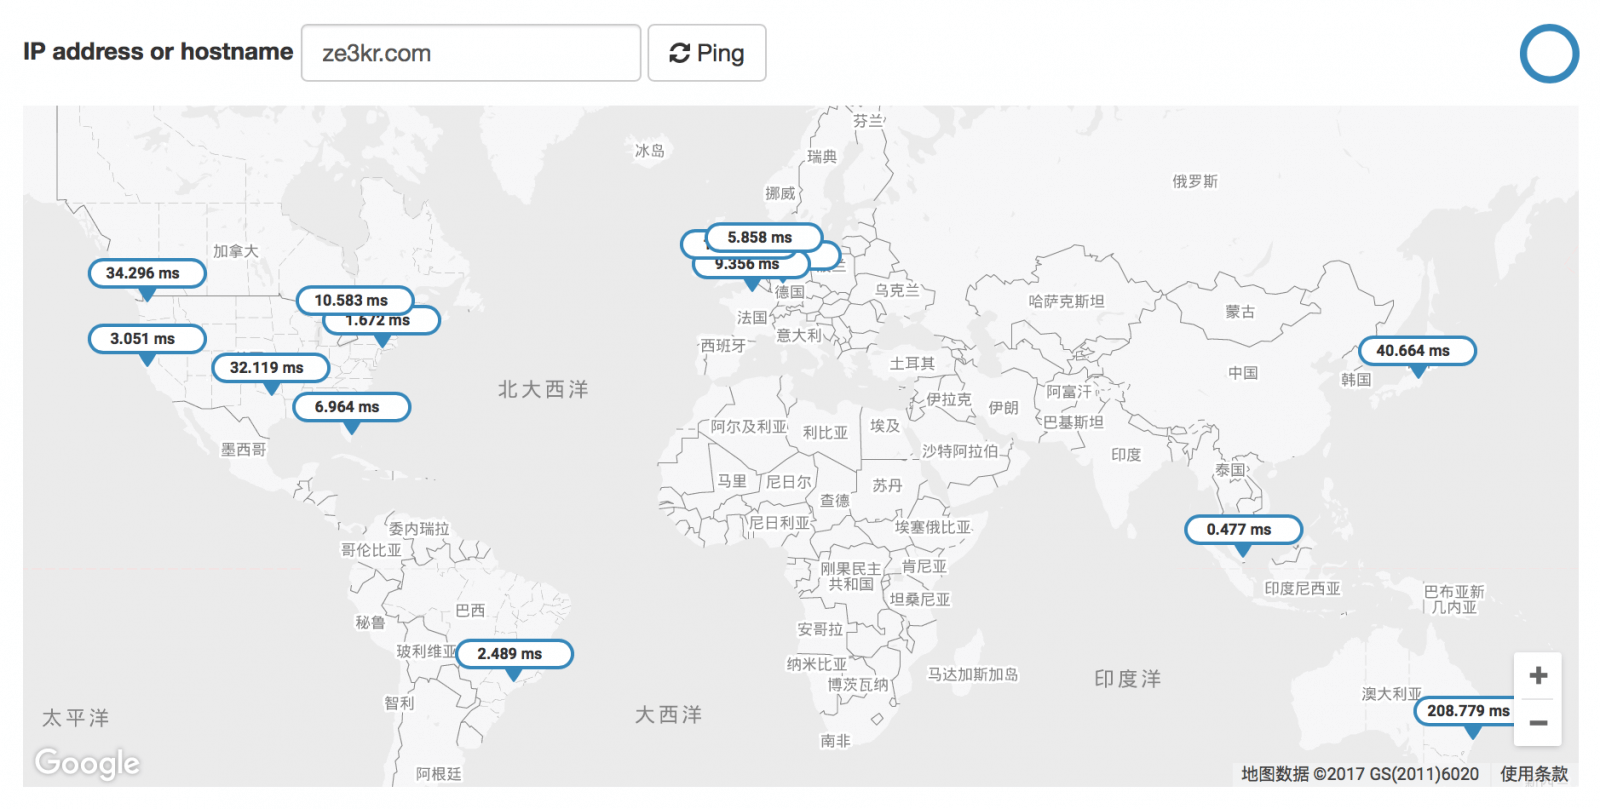
The focus is on routers and search domains. The hostname of my computer (also the computer name) is set to ze3kr, this content is also known by the router when connecting to the router, so the router assigns a domain name ze3kr.local, local to my host This first-level domain name is exclusively for local use. When all hosts in this network access the domain name ze3kr.local, the router (10.0.1.1) will inform the IP address corresponding to this domain name, so these hosts can get the IP address of my computer. As for the function of the search domain, it is actually possible to save the input of the complete domain name, such as:
$ ping ze3krPING ze3kr.local (10.0.1.201): 56 data bytes64 bytes from 10.0.1.201: icmp_seq=0 ttl=64 time=0.053 ms--- ze3kr.local ping statistics ---1 packets transmitted, 1 packets received, 0.0% packet lossround-trip min/avg/max/stddev = 0.053/0.053/0.053/0.000 ms
When the search domain is set, when you go to resolve the first-level domain name of ze3kr, it will first try to resolve ze3kr.local, and when it finds that there is a corresponding resolution in ze3kr.local, it will stop further analysis. Use the address of ze3kr.local directly. Now you understand how local DNS works. The basic working method of DNS is to obtain the IP corresponding to the domain name, and then communicate with this IP. When obtaining a full domain name (FQDN) locally (execute getaddrbyhost), it is usually resolved through the DNS provided by the router itself. When the router receives a complete domain name request and there is no cache, it will continue to query the next-level cache DNS server (for example, provided by the operator, or provided by the organization, such as 8.8.8.8), and the next-level cache DNS server has no When cached, it is queried through the global DNS. The specific query method is described in “Global DNS”.
Summarize
Locally, the local cache lookup record is read first, then the Hosts file is read, then the domain name is looked up in the search domain, and finally the DNS record is requested from the router.
Global DNS
In the global DNS, a complete domain name usually contains multiple levels, for example example.com. is a second-level domain name, www.example.com. is a third-level domain name. Usually the domain names we commonly see are full domain names.
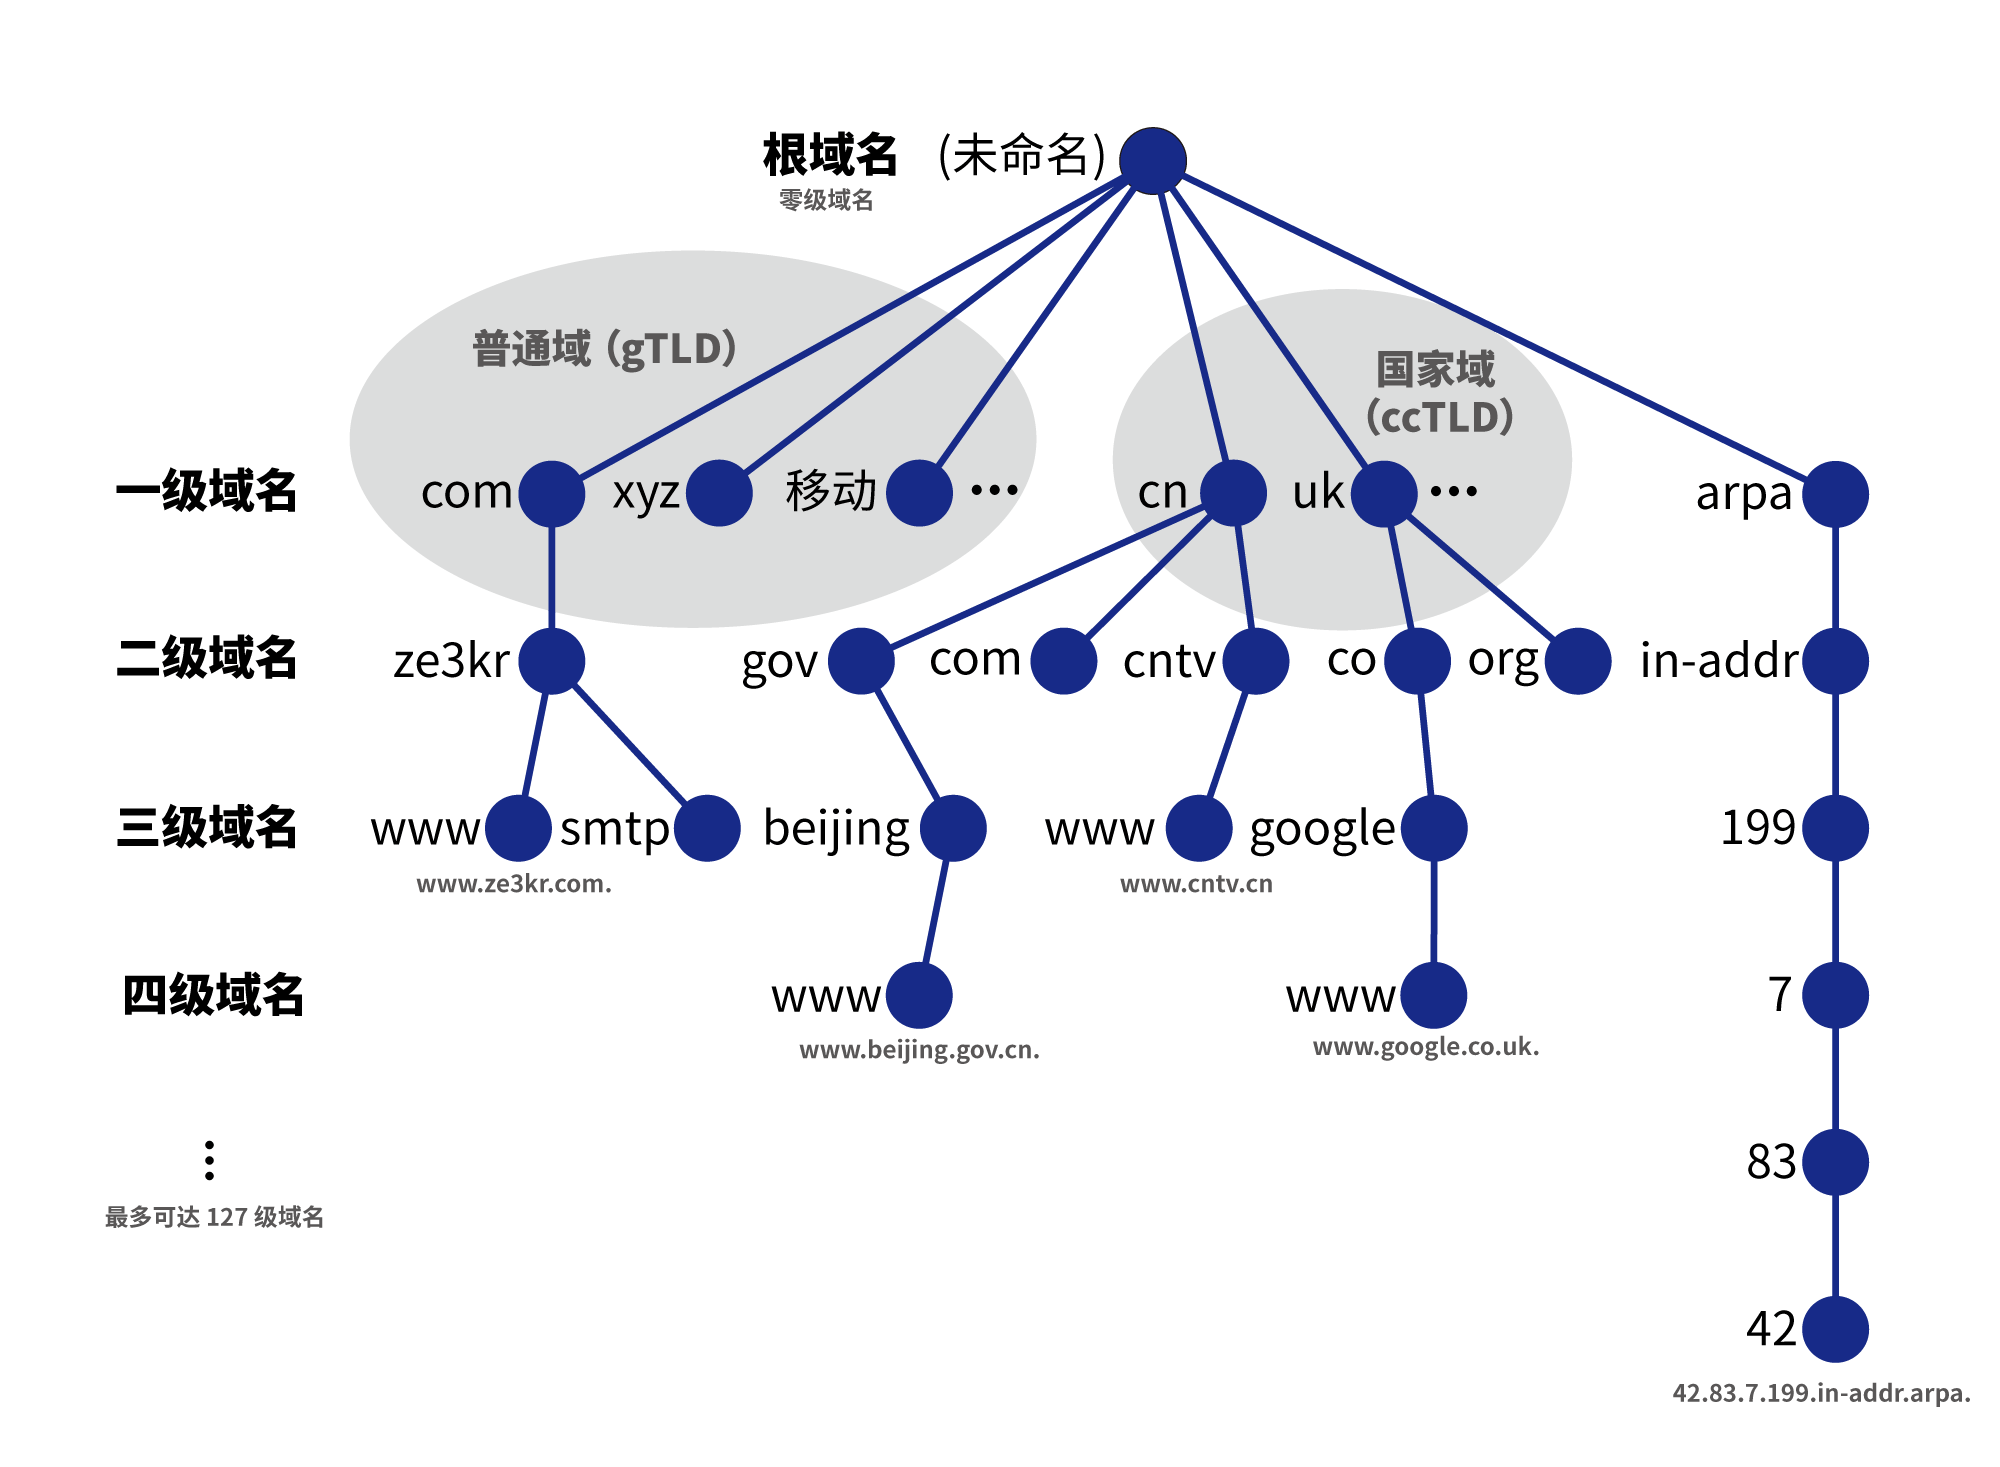
The first-level domain name is divided into the following three parts:
- General Domain (gTLD): Usually a domain name suffix of three or more bytes, or a suffix of Unicode characters. These domain names are assigned to institutional management.
- Country Domain (ccTLD): All two-byte domain names are country codes, and these domain names are assigned to country administration. Many country domains are open for registration, but some country domains only allow people from the current country to register.
arpa domain: The root domain used to translate the IP address to the corresponding domain name.
The domain names we usually see are normal domains and country domains, and the arpa domain is used for reverse resolution from IP to domain name. In the local DNS, there is only a mapping relationship between domain names and IP addresses. However, in the global DNS, there are more types of resource records (RRs), not just the relationship between domain names and IPs. The following will introduce some of the most basic types of resource records:
A record: defines an IP address. (AAAA records define an IPv6 address) (RFC 1035)
- NS record: Domain name server record, indicating the authorized domain name server record under a domain name. Content must be a domain name. (RFC 1035)
Root Domain Name
Start with the root domain name, unnamed root can also be used as . . Many domain names that you will see in the following sections end with .. Domain names ending with . refer to the full domain name under the root domain name. However, most domain names that do not end with . are also full. Domain name, the . at the end of the domain name is often omitted in actual use. In this article, I use dig, a commonly used DNS software, to do the query, and my computer is connected to the Internet. Suppose that currently this computer can communicate with IPs on the Internet, but has no DNS servers at all. At this point you need to know the root DNS server in order to obtain the IP address of a domain name yourself. The list of root DNS servers can be downloaded here. The contents of the file are as follows:
; This file holds the information on root name servers needed to; initialize cache of Internet domain name servers; (e.g. reference this file in the "cache . <file>"; configuration file of BIND domain name servers).;; This file is made available by InterNIC; under anonymous FTP as; file /domain/named.cache; on server FTP.INTERNIC.NET; -OR- RS.INTERNIC.NET;; last update: October 20, 2016; related version of root zone: 2016102001;; formerly NS.INTERNIC.NET;. 3600000 NS A.ROOT-SERVERS.NET.A.ROOT-SERVERS.NET. 3600000 A 198.41.0.4A.ROOT-SERVERS.NET.3600000 AAAA 2001:503:ba3e::2:30;; FORMERLY NS1.ISI.EDU;.3600000 NS B.ROOT-SERVERS.NET.B.ROOT-SERVERS.NET. 3600000 A 192.228.79.201B.ROOT-SERVERS.NET.3600000 AAAA 2001:500:84::b;; FORMERLY C.PSI.NET;.3600000 NS C.ROOT-SERVERS.NET.C.ROOT-SERVERS.NET. 3600000 A 192.33.4.12C.ROOT-SERVERS.NET.3600000 AAAA 2001:500:2::c;; FORMERLY TERP.UMD.EDU;. 3600000 NS D.ROOT-SERVERS.NET.D.ROOT-SERVERS.NET. 3600000 A 199.7.91.13D.ROOT-SERVERS.NET.3600000 AAAA 2001:500:2d::d;;FORMERLY NS.NASA.GOV;.3600000 NS E.ROOT-SERVERS.NET.E.ROOT-SERVERS.NET. 3600000 A 192.203.230.10E.ROOT-SERVERS.NET.3600000 AAAA 2001:500:a8::e;; FORMERLY NS.ISC.ORG;. 3600000 NS F.ROOT-SERVERS.NET.F.ROOT-SERVERS.NET. 3600000 A 192.5.5.241F.ROOT-SERVERS.NET.3600000 AAAA 2001:500:2f::f;; FORMERLY NS.NIC.DDN.MIL;. 3600000 NS G.ROOT-SERVERS.NET.G.ROOT-SERVERS.NET. 3600000 A 192.112.36.4G.ROOT-SERVERS.NET.3600000 AAAA 2001:500:12::d0d;; FORMERLY AOS.ARL.ARMY.MIL;. 3600000 NS H.ROOT-SERVERS.NET.H.ROOT-SERVERS.NET. 3600000 A 198.97.190.53H.ROOT-SERVERS.NET.3600000 AAAA 2001:500:1::53;; FORMERLY NIC.NORDU.NET;. 3600000 NS I.ROOT-SERVERS.NET.I.ROOT-SERVERS.NET. 3600000 A 192.36.148.17I.ROOT-SERVERS.NET.3600000 AAAA 2001:7fe::53;; OPERATED BY VERISIGN, INC.;. 3600000 NS J.ROOT-SERVERS.NET.J.ROOT-SERVERS.NET. 3600000 A 192.58.128.30J.ROOT-SERVERS.NET.3600000 AAAA 2001:503:c27::2:30;; OPERATED BY RIPE NCC;. 3600000 NS K.ROOT-SERVERS.NET.K.ROOT-SERVERS.NET. 3600000 A 193.0.14.129K.ROOT-SERVERS.NET.3600000 AAAA 2001:7fd::1;; OPERATED BY ICANN;. 3600000 NS L.ROOT-SERVERS.NET.L.ROOT-SERVERS.NET. 3600000 A 199.7.83.42L.ROOT-SERVERS.NET.3600000 AAAA 2001:500:9f::42;; OPERATED BY WIDE;. 3600000 NS M.ROOT-SERVERS.NET.M.ROOT-SERVERS.NET. 3600000 A 202.12.27.33M.ROOT-SERVERS.NET.3600000 AAAA 2001:dc3::35; End of file
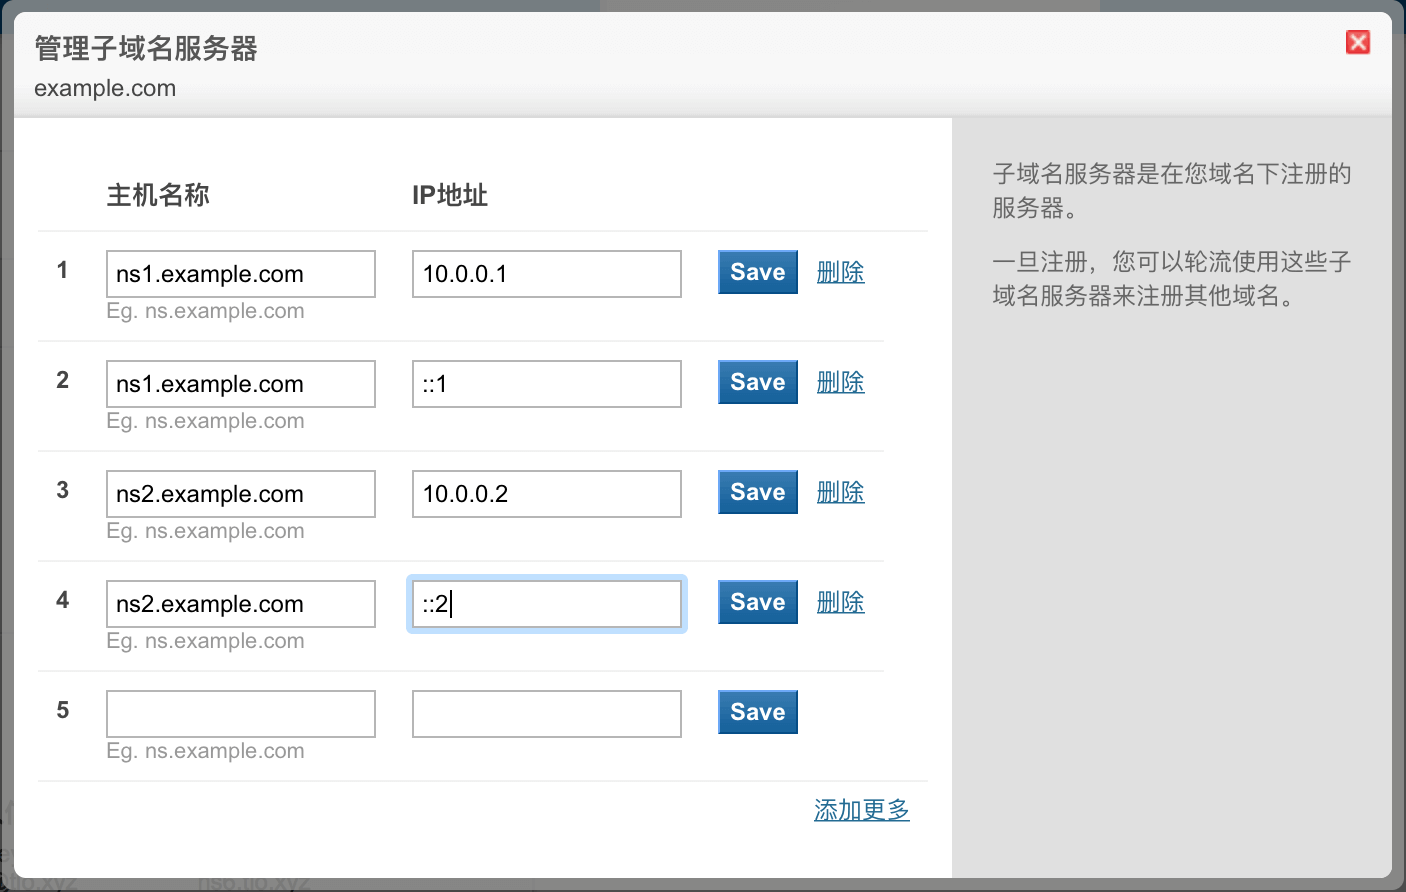
Each line in this file is divided into 4 columns, which are the full domain name, resource type, time-to-live (TTL, which is the time that can be cached), and resource data. Through this file, you can know the complete domain names of the 13 root domain name servers corresponding to the root domain name, as well as the IP addresses corresponding to these 13 complete domain names. This is because NS records can only be set to complete domain names, so in order to inform NS of the corresponding IPs, additional data is needed to describe the IPs corresponding to these 13 complete domain names (these additional data are called Glue records). The 13 root nameservers are all independent and redundant (but the content returned should be the same), so that if one or some of these servers fail, resolution will not be affected. Once the root domain name cannot be resolved, all domain names will be inaccessible.
Glue record: If a complete domain name corresponding to the NS record is included in that domain name, then a Glue record needs to be added to specify the IP corresponding to that complete domain name. In fact, any full domain name belongs to the root domain name, so the root domain name must set the corresponding IP address for these NS records. Glue records are essentially A (or AAAA) records. (RFC 1033)
We assume that you have successfully obtained this file by some means, then the next step is to use the server here to resolve the root domain name and first-level domain name. The resolution of the root domain name is actually unnecessary, but we still analyze it for further analysis and obtain the latest and most complete data on the Internet. The record on the root domain name is based on the data of the root domain name resolved from the root domain name server, not the content in the file just now. The content of the file just now only informs the list of root domain name servers, that is, only the IP records of the full domain name corresponding to the NS record and the NS record, not all records under the root domain name. We first send a query to the IP of 198.41.0.4 for all records of the root domain name, any means to display any type of records, for the sake of convenience, some irrelevant responses have been deleted (if only the root domain name is resolved, this step cannot be skipped. If you need to directly resolve the first-level domain name, then this step can be skipped).
$ dig@198.41.0.4.any;; QUESTION SECTION:;. IN ANY;; ANSWER SECTION:. 518400 IN NS a.root-servers.net.. 518400 IN NS b.root-servers.net.. 518400 IN NS c.root-servers.net.. 518400 IN NS d.root-servers.net.. 518400 IN NS e.root-servers.net.. 518400 IN NS f.root-servers.net.. 518400 IN NS g.root-servers.net.. 518400 IN NS h.root-servers.net.. 518400 IN NS i.root-servers.net.. 518400 IN NS j.root-servers.net.. 518400 IN NS k.root-servers.net.. 518400 IN NS l.root-servers.net.. 518400 IN NS m.root-servers.net..86400 IN SOA a.root-servers.net.nstld.verisign-grs.com.2016122400 1800 900 604800 86400;; ADDITIONAL SECTION:a.root-servers.net.518400 IN A 198.41.0.4b.root-servers.net.518400 IN A 192.228.79.201c.root-servers.net.518400 IN A 192.33.4.12d.root-servers.net.518400 IN A 199.7.91.13e.root-servers.net.518400 IN A 192.203.230.10f.root-servers.net.518400 IN A 192.5.5.241g.root-servers.net.518400 IN A 192.112.36.4h.root-servers.net.518400 IN A 198.97.190.53i.root-servers.net.518400 IN A 192.36.148.17j.root-servers.net.518400 IN A 192.58.128.30k.root-servers.net.518400 IN A 193.0.14.129l.root-servers.net.518400 IN A 199.7.83.42m.root-servers.net.518400 IN A 202.12.27.33a.root-servers.net.518400 IN AAAA 2001:503:ba3e::2:30b.root-servers.net.518400 IN AAAA 2001:500:84::bc.root-servers.net.518400 IN AAAA 2001:500:2::cd.root-servers.net.518400 IN AAAA 2001:500:2d::de.root-servers.net.518400 IN AAAA 2001:500:a8::ef.root-servers.net.518400 IN AAAA 2001:500:2f::fg.root-servers.net.518400 IN AAAA 2001:500:12::d0dh.root-servers.net.518400 IN AAAA 2001:500:1::53i.root-servers.net.518400 IN AAAA 2001:7fe::53j.root-servers.net.518400 IN AAAA 2001:503:c27::2:30k.root-servers.net.518400 IN AAAA 2001:7fd::1l.root-servers.net.518400 IN AAAA 2001:500:9f::42m.root-servers.net.518400 IN AAAA 2001:dc3::35
Among them, you can see that the TTL is not the same as the content in the file just now, and there is an additional SOA record, so the result here is subject to. There is also a SOA record here. SOA records are ubiquitous. Please refer to the documentation for details. I won’t explain too much here.
SOA records: Specifies authoritative information about the DNS zone, including the primary name server, the domain administrator’s email address, the serial number of the domain name, and several timers for flushing the zone. (RFC 1035)
DNS zone: For the root domain name, the DNS zone is empty, which means it is responsible for all domain names on the Internet. For my website, the DNS zone is guozeyu.com., which manages records for guozeyu.com. itself and its subdomains.
The ADDITIONAL SECTION here actually contains Glue records.
First-Level Domain Name
The DNS server of the root domain name itself is used not only to resolve the root itself, but also to resolve all first-level domain names on the Internet. You will find that almost all DNS servers, root DNS servers or not, resolve themselves and their subordinate domain names. As can be seen from the previous resolution results, the root domain name is not assigned to any IP address, but NS records are given, so we need to use these NS records to resolve its subordinate first-level domain names. Next, use one of the servers in the resulting root NS record to resolve a first-level domain name com..
$ dig @198.41.0.4 com any;; QUESTION SECTION:;com. IN ANY;; AUTHORITY SECTION:com. 172800 IN NS a.gtld-servers.net.com. 172800 IN NS b.gtld-servers.net.com. 172800 IN NS c.gtld-servers.net.com. 172800 IN NS d.gtld-servers.net.com. 172800 IN NS e.gtld-servers.net.com. 172800 IN NS f.gtld-servers.net.com. 172800 IN NS g.gtld-servers.net.com. 172800 IN NS h.gtld-servers.net.com. 172800 IN NS i.gtld-servers.net.com. 172800 IN NS j.gtld-servers.net.com. 172800 IN NS k.gtld-servers.net.com. 172800 IN NS l.gtld-servers.net.com. 172800 IN NS m.gtld-servers.net.;; ADDITIONAL SECTION:a.gtld-servers.net.172800 IN A 192.5.6.30b.gtld-servers.net.172800 IN A 192.33.14.30c.gtld-servers.net.172800 IN A 192.26.92.30d.gtld-servers.net.172800 IN A 192.31.80.30e.gtld-servers.net.172800 IN A 192.12.94.30f.gtld-servers.net.172800 IN A 192.35.51.30g.gtld-servers.net.172800 IN A 192.42.93.30h.gtld-servers.net.172800 IN A 192.54.112.30i.gtld-servers.net.172800 IN A 192.43.172.30j.gtld-servers.net.172800 IN A 192.48.79.30k.gtld-servers.net. 172800 IN A 192.52.178.30l.gtld-servers.net.172800 IN A 192.41.162.30m.gtld-servers.net.172800 IN A 192.55.83.30a.gtld-servers.net.172800 IN AAAA 2001:503:a83e::2:30b.gtld-servers.net.172800 IN AAAA 2001:503:231d::2:30
You can see that the result of the resolution is similar to that of the root domain name. There are also 13 domain name servers set up under com., but these 13 domain name servers are completely different from the root domain server.
There are also Glue records included in ADDITIONAL SECTION, however gtld-servers.net. is not included under com.. However, in reality, both the com. and net. domains belong to the same owner (Verisign), so this setting is fine.
Similar to the root domain name, the content resolved at this time is only the domain name server of com., not the record of com. itself, ** the record on com., from the domain name of com. The data of its com. domain name resolved in the server shall prevail. ** So, let’s use the domain name server of com. to resolve com. itself, depending on the situation (if you only resolve the first-level domain name, this step cannot be skipped. If you need to directly resolve the second-level domain name, then this step can be skipped):
$ dig @192.5.6.30 com any;; QUESTION SECTION:;com. IN ANY;; ANSWER SECTION:com. 900 IN SOA a.gtld-servers.net. nstld.verisign-grs.com. 1482571852 1800 900 604800 86400com. 172800 IN NS e.gtld-servers.net.com. 172800 IN NS m.gtld-servers.net.com. 172800 IN NS i.gtld-servers.net.com. 172800 IN NS k.gtld-servers.net.com. 172800 IN NS b.gtld-servers.net.com. 172800 IN NS j.gtld-servers.net.com. 172800 IN NS a.gtld-servers.net.com. 172800 IN NS d.gtld-servers.net.com. 172800 IN NS g.gtld-servers.net.com. 172800 IN NS c.gtld-servers.net.com. 172800 IN NS h.gtld-servers.net.com. 172800 IN NS f.gtld-servers.net.com. 172800 IN NS l.gtld-servers.net.;; ADDITIONAL SECTION:e.gtld-servers.net.172800 IN A 192.12.94.30m.gtld-servers.net.172800 IN A 192.55.83.30i.gtld-servers.net.172800 IN A 192.43.172.30k.gtld-servers.net. 172800 IN A 192.52.178.30b.gtld-servers.net.172800 IN A 192.33.14.30b.gtld-servers.net.172800 IN AAAA 2001:503:231d::2:30j.gtld-servers.net.172800 IN A 192.48.79.30a.gtld-servers.net.172800 IN A 192.5.6.30a.gtld-servers.net.172800 IN AAAA 2001:503:a83e::2:30d.gtld-servers.net.172800 IN A 192.31.80.30g.gtld-servers.net.172800 IN A 192.42.93.30c.gtld-servers.net.172800 IN A 192.26.92.30h.gtld-servers.net.172800 IN A 192.54.112.30f.gtld-servers.net.172800 IN A 192.35.51.30l.gtld-servers.net.172800 IN A 192.41.162.30
Similar to the case of root domain name resolution, there is an additional SOA type record.
Secondary Domain
Similar to parsing the first-level domain name com., continue to use the domain name server of com. to resolve guozeyu.com..
$ dig @192.5.6.30 guozeyu.com any;; QUESTION SECTION:;guozeyu.com. IN ANY;; AUTHORITY SECTION:guozeyu.com. 172800 IN NS a.ns.guozeyu.com.guozeyu.com. 172800 IN NS b.ns.guozeyu.com.guozeyu.com. 172800 IN NS c.ns.guozeyu.com.;; ADDITIONAL SECTION:a.ns.guozeyu.com. 172800 IN AAAA 2001:4860:4802:38::6ca.ns.guozeyu.com. 172800 IN A 216.239.38.108b.ns.guozeyu.com. 172800 IN AAAA 2001:4860:4802:36::6cb.ns.guozeyu.com. 172800 IN A 216.239.36.108c.ns.guozeyu.com. 172800 IN AAAA 2001:4860:4802:34::6cc.ns.guozeyu.com. 172800 IN A 216.239.34.108
The Glue record contained in ADDITIONAL SECTION also exists here because ns.guozeyu.com. is under guozeyu.com.. Similarly, records on guozeyu.com. are based on the data of its guozeyu.com. domain name resolved from the guozeyu.com. domain name server. This parsing is especially necessary at this point, because guozeyu.com. not only has SOA records, but also A records and other important records. Now use the domain name server of guozeyu.com. to resolve guozeyu.com. (If you only resolve the second-level domain name, this step cannot be skipped. If you need to resolve the third-level domain name, this step can be skipped):
$ dig @216.239.38.108 guozeyu.com any;; QUESTION SECTION:;guozeyu.com. IN ANY;; ANSWER SECTION:guozeyu.com. 21600 IN A 104.199.138.99guozeyu.com. 172800 IN NS a.ns.guozeyu.com.guozeyu.com. 172800 IN NS b.ns.guozeyu.com.guozeyu.com. 172800 IN NS c.ns.guozeyu.com.guozeyu.com. 21600 IN SOA a.ns.guozeyu.com. support.tlo.xyz. 1 21600 3600 259200 300guozeyu.com. 172800 IN MX 100 us2.mx1.mailhostbox.com.guozeyu.com. 172800 IN MX 100 us2.mx2.mailhostbox.com.guozeyu.com. 172800 IN MX 100 us2.mx3.mailhostbox.com.;; ADDITIONAL SECTION:a.ns.guozeyu.com. 604800 IN A 216.239.38.108a.ns.guozeyu.com. 604800 IN AAAA 2001:4860:4802:38::6cb.ns.guozeyu.com. 604800 IN A 216.239.36.108b.ns.guozeyu.com. 604800 IN AAAA 2001:4860:4802:36::6cc.ns.guozeyu.com. 604800 IN A 216.239.34.108c.ns.guozeyu.com. 604800 IN AAAA 2001:4860:4802:34::6c
It can be found that A, SOA and MX records have been added.
- MX records: Mail exchange records, allowing mail sent to a domain name to be accepted by other hosts, for coexistence with A records. (RFC 1035)
It is precisely because of the existence of the MX record that the mail sent to username@guozeyu.com does not point to the IP address corresponding to guozeyu.com., but uses the server under mailhostbox.com.. Of course, since I am the owner of guozeyu.com., I can also control the third-level or higher domains under guozeyu.com.. For example www.guozeyu.com.:
$ dig @216.239.38.108 www.guozeyu.com any;; QUESTION SECTION:;guozeyu.com. IN ANY;; ANSWER SECTION:www.guozeyu.com. 172800 IN CNAME guozeyu.com.guozeyu.com. 21600 IN A 104.199.138.99guozeyu.com. 172800 IN NS a.ns.guozeyu.com.guozeyu.com. 172800 IN NS b.ns.guozeyu.com.guozeyu.com. 172800 IN NS c.ns.guozeyu.com.guozeyu.com. 21600 IN SOA a.ns.guozeyu.com. support.tlo.xyz. 1 21600 3600 259200 300guozeyu.com. 172800 IN MX 100 us2.mx1.mailhostbox.com.guozeyu.com. 172800 IN MX 100 us2.mx2.mailhostbox.com.guozeyu.com. 172800 IN MX 100 us2.mx3.mailhostbox.com.;; ADDITIONAL SECTION:a.ns.guozeyu.com. 604800 IN A 216.239.38.108a.ns.guozeyu.com. 604800 IN AAAA 2001:4860:4802:38::6cb.ns.guozeyu.com. 604800 IN A 216.239.36.108b.ns.guozeyu.com. 604800 IN AAAA 2001:4860:4802:36::6cc.ns.guozeyu.com. 604800 IN A 216.239.34.108c.ns.guozeyu.com. 604800 IN AAAA 2001:4860:4802:34::6c
- CNAME record: Canonical name record, an alias for a hostname. Content must be a domain name. (RFC 1035)
My third-level domain www.guozeyu.com. uses a CNAME record to point to guozeyu.com., which means that all resource types under guozeyu.com. are the same as guozeyu.com. same. This is also the reason why CNAME cannot be used with any other record, the existence of CNAME supersedes any other record. Since SOA, NS and MX records often exist under the primary domain name, CNAME resolution cannot be used under the primary domain name. In addition, I can also set the third-level domain name under guozeyu.com. to point to an NS record, so that I can use my third-level domain name for others to use.
Summarize
- If you need to resolve a root domain name, use the root domain name server to resolve the root domain name.
- If you need to resolve a first-level domain name, you need to use the root domain name server to resolve the first-level domain name, obtain the domain name server of the first-level domain name, and then use the first-level domain name server to resolve the first-level domain name itself.
- If you need to resolve a second-level domain name, you need to use the root domain name server to resolve the first-level domain name, obtain the domain name server of the first-level domain name, then use the first-level domain name server to obtain the second-level domain name server, and then use the second-level domain name server. Resolve the second-level domain name itself.
- If you need to resolve a third-level domain name, you need to use the root domain name server to resolve the first-level domain name, obtain the domain name server of the first-level domain name, then use the first-level domain name server to obtain the second-level domain name server, and then use the second-level domain name server. Parse the third-level domain name. If there is no NS or CNAME record under the third-level domain name, the parsing ends. If there is a CNAME record, the domain name pointed to by the CNAME will be parsed through the normal resolution method. If there is an NS record, the third-level domain name will be used. The domain name server resolves the third-level domain name itself.
DNS Cache
Usually, all parsed records will be cached by the parsing server, router, client, and software. This can greatly reduce the number of requests. Any cached record will not be parsed again within the time specified by TTL, but will be read directly from the cache. Under normal circumstances, servers, routers, etc. should not expand the TTL value. For cached content, the TTL value is decremented by 1 every second.
$ dig guozeyu.com;; QUESTION SECTION:;guozeyu.com. IN A;; ANSWER SECTION:guozeyu.com. 21599 IN A 104.199.138.99;; Query time: 514 msec;; SERVER: 10.0.1.1#53(10.0.1.1);; WHEN: Sat Dec 24 20:00:29 2016;; MSG SIZE rcvd: 43$ dig guozeyu.com;; QUESTION SECTION:;guozeyu.com. IN A;; ANSWER SECTION:guozeyu.com. 21598 IN A 104.199.138.99;; Query time: 45 msec;; SERVER: 10.0.1.1#53(10.0.1.1);; WHEN: Sat Dec 24 20:00:30 2016
This is the result of parsing guozeyu.com. directly through the router on my computer twice in a row. Obviously, the first resolution did not hit the cache. The router queries the carrier’s DNS server, and the carrier’s DNS resolves guozeyu.com. from the root domain name level by level, which takes 514 milliseconds in total. Then guozeyu.com. will be cached on both the carrier’s server and the router’s DNS server. When guozeyu.com. was requested for the second time, the cache on the router was hit, so the router directly returned the parsing record, which took 45 milliseconds in total. The two queries are one second apart, so the TTL value is also subtracted by 1 .
arpa Reverse Parsing
Reverse resolution is used to: given an IP address, return the domain name corresponding to the address. The function gethostbyaddr uses this method to obtain the domain name corresponding to the IP. The first-level domain name arpa. It is used to set up reverse resolution. For the IPv4 address of my website 104.199.138.99, the corresponding full domain name of arpa is: 99.138.199.104.in-addr.arpa., through Get the PTR record of this domain name, you can get the full domain name corresponding to this domain name.
$ host 104.199.138.9999.138.199.104.in-addr.arpa domain name pointer 99.138.199.104.bc.googleusercontent.com.$ dig 99.138.199.104.in-addr.arpa.ptr +short99.138.199.104.bc.googleusercontent.com.
- PTR record: Pointer resolution record, the content is a complete domain name, which defines the domain name corresponding to an IP.
As you can see, the domain name of the IP address obtained by using the host command is the same as that obtained by using dig, both are 99.138.199.104.bc.googleusercontent.com. . It can be seen that this IP belongs to Google. In addition, it should be noted that the domain name under in-addr.arpa. is exactly the opposite of the original IPv4 address arrangement. This record can usually be set by the owner of the IP. However, the IP owner can set this record to any domain name, including someone else’s. Therefore, it is not accurate to judge that it belongs to Google by this method, so we also need to verify it:
$ dig 99.138.199.104.bc.googleusercontent.com a +short104.199.138.99
It can be seen that the domain name has been resolved to the original IP again. At this time, the verification is completed and it is confirmed that the IP belongs to Google. So, after passing gethostbyaddr, continue with getaddrbyhost verification. However, who provides the parsing server for this parsing? Let’s take a look at the resolution record of the upper-level domain name of 99.138.199.104.in-addr.arpa.:
$ dig 138.199.104.in-addr.arpa.any;; QUESTION SECTION:;138.199.104.in-addr.arpa.IN ANY;; ANSWER SECTION:138.199.104.in-addr.arpa. 21583 IN NS ns-gce-public1.googledomains.com.138.199.104.in-addr.arpa. 21583 IN NS ns-gce-public2.googledomains.com.138.199.104.in-addr.arpa. 21583 IN NS ns-gce-public3.googledomains.com.138.199.104.in-addr.arpa.21583 IN NS ns-gce-public4.googledomains.com.138.199.104.in-addr.arpa.21583 IN SOA ns-gce-public1.googledomains.com.cloud-dns-hostmaster.google.com.1 21600 3600 259200 300
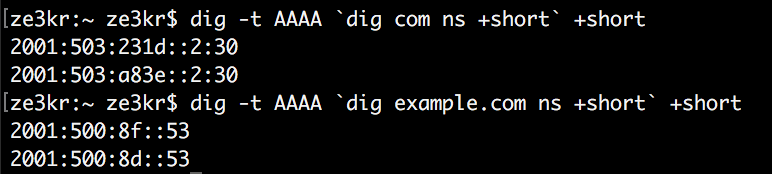
It can be seen that Google’s domain name server is configured under the upper level 138.199.104.in-addr.arpa., so 104.199.138.0/24 (104.196.123.0 - 104.196.123.255) belong to Google of. However, since the domain name server under this domain name can be set to Google’s own, any record can be set under this domain name, not only PTR, so you can also add A records to treat the arpa domain name as a website! I don’t have that large block of IPv4 addresses, but I have this IPv6 address: 2001:470:f913::/48 and can set NS records under arpa.. This /48 IPv6 address corresponds to the full domain name of arpa. reverse resolution is 3.1.9.f.0.7.4.0.1.0.0.2.ip6.arpa., you can see that the reverse resolution of IPv6 is in another secondary domain name ip6.arpa ., in addition, its address is to split each hexadecimal value of IPv6 into a field and arrange it in reverse. I have set this address as the NS that I can control, and then configured the A record, and the reverse resolution domain name can be used as a normal resolution in an instant!
3.1.9.f.0.7.4.0.1.0.0.2.ip6.arpaze3kr.3.1.9.f.0.7.4.0.1.0.0.2.ip6.arpa
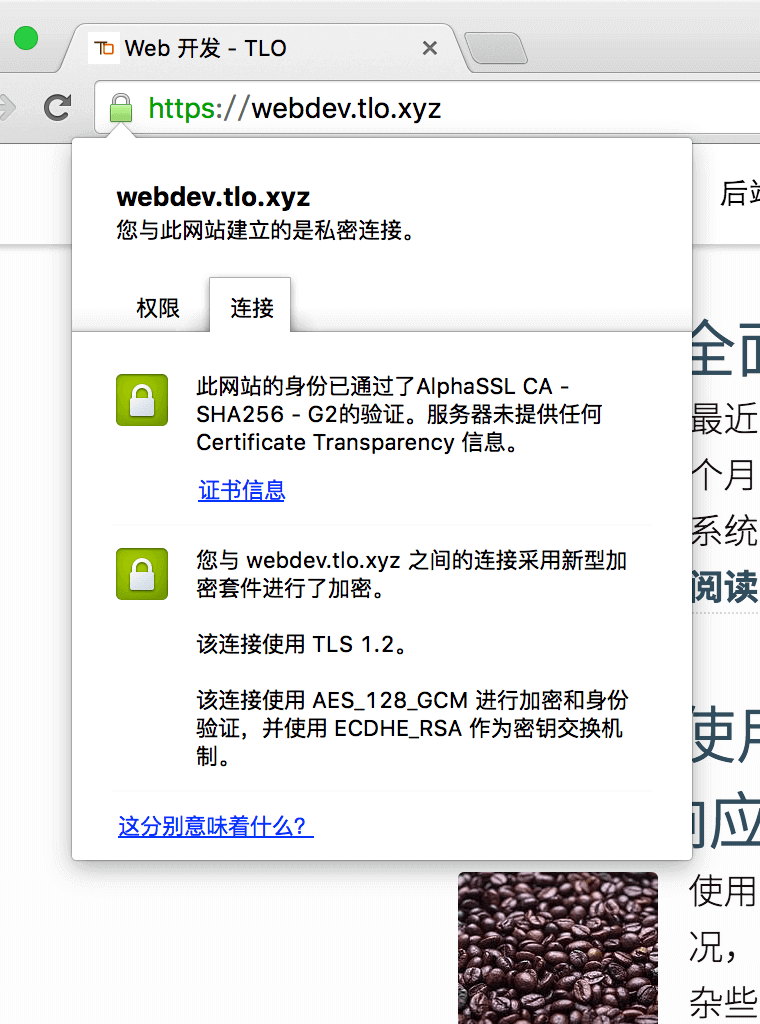
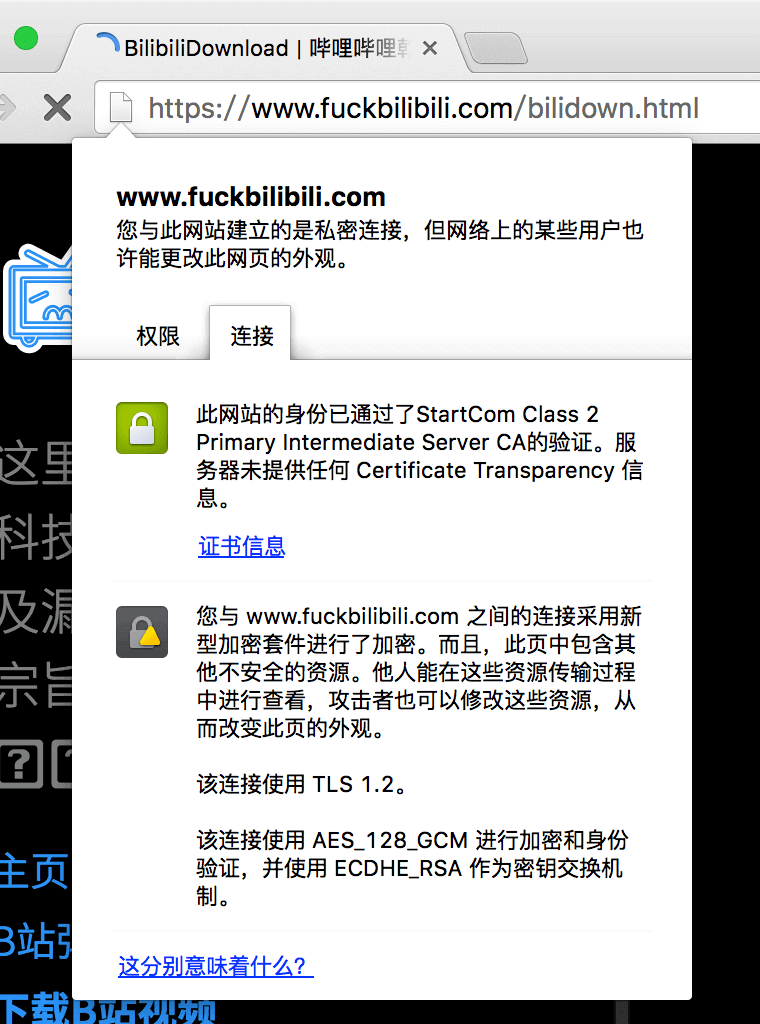
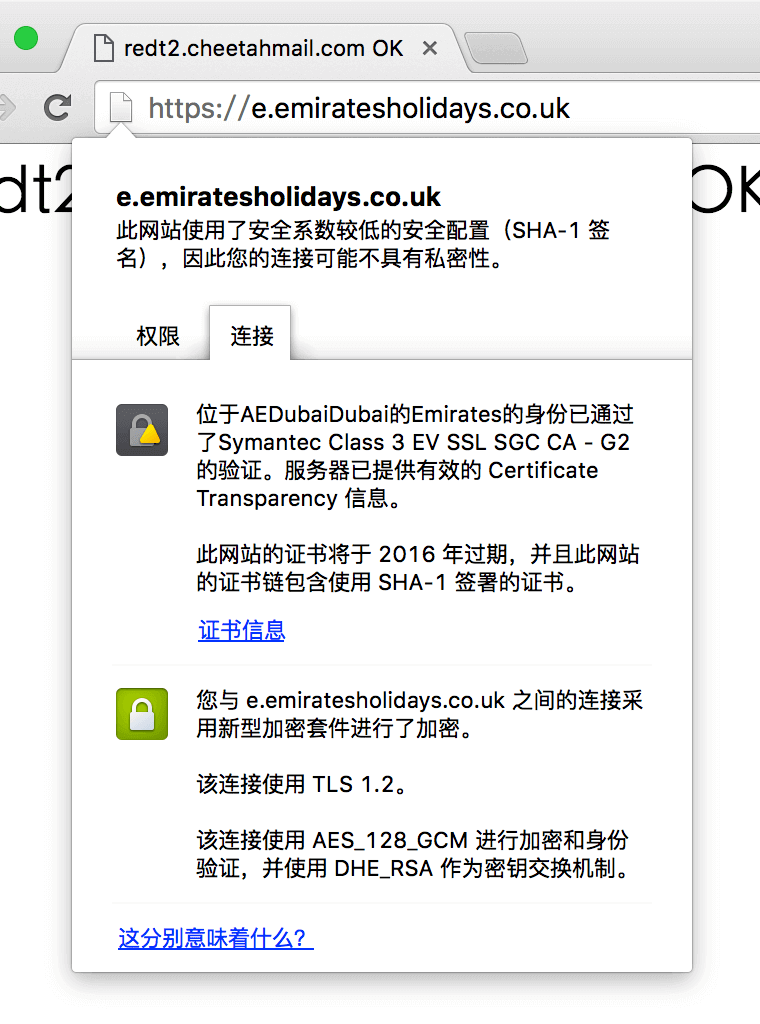
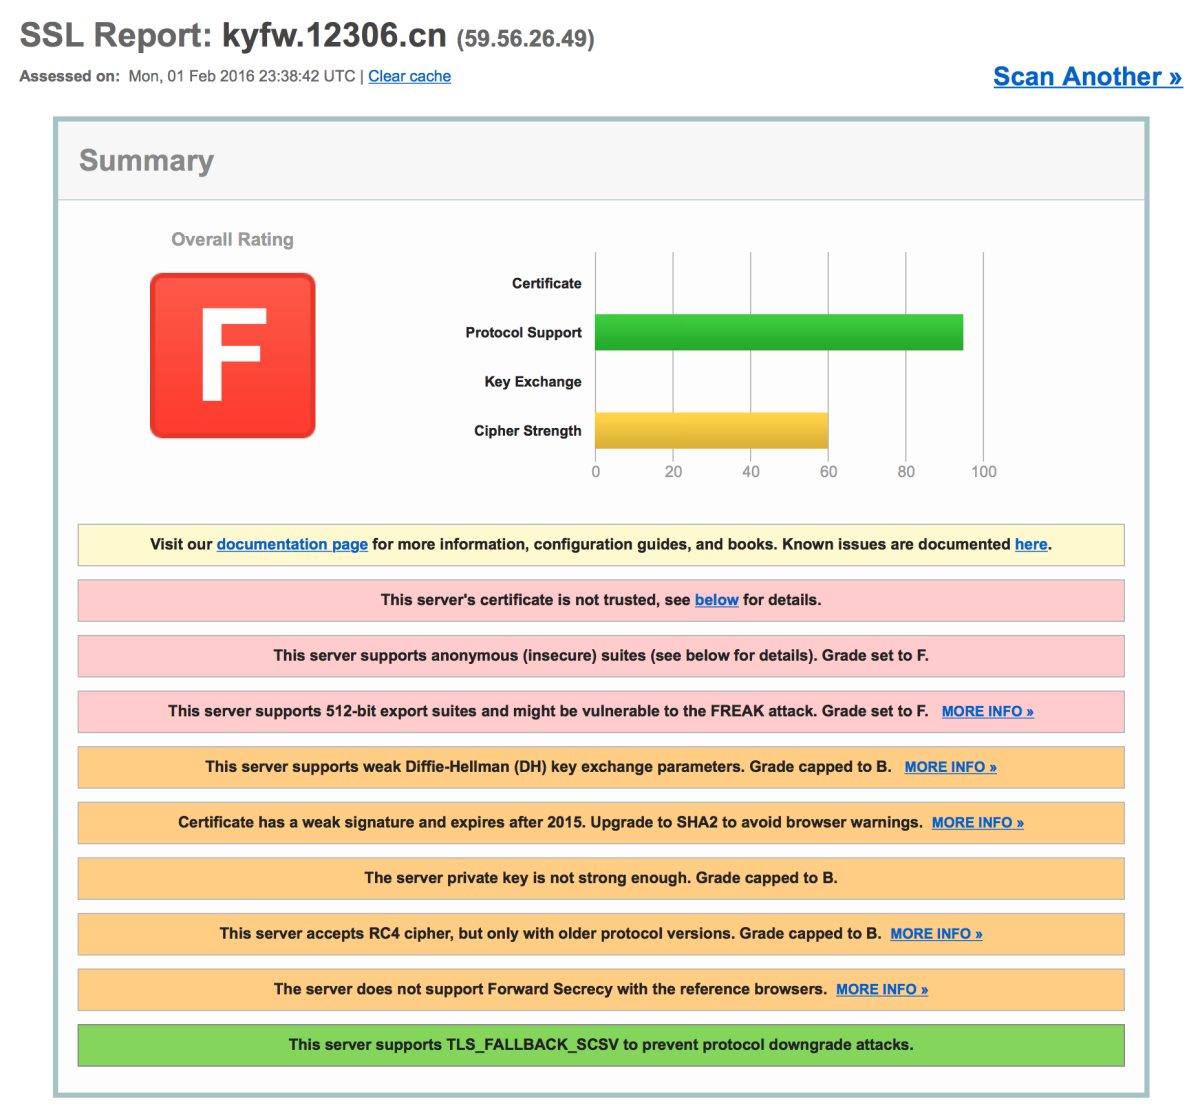
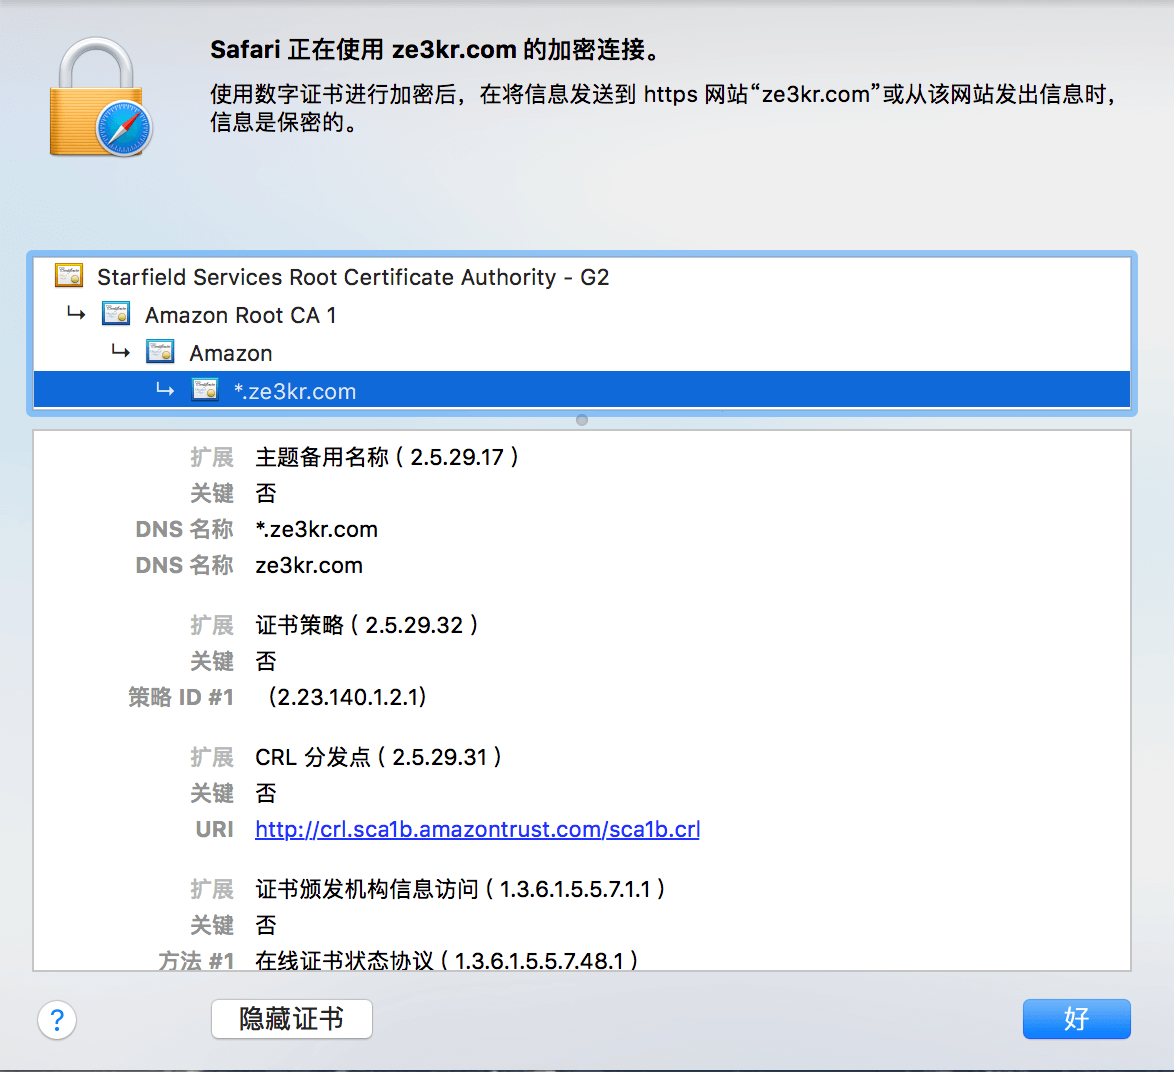
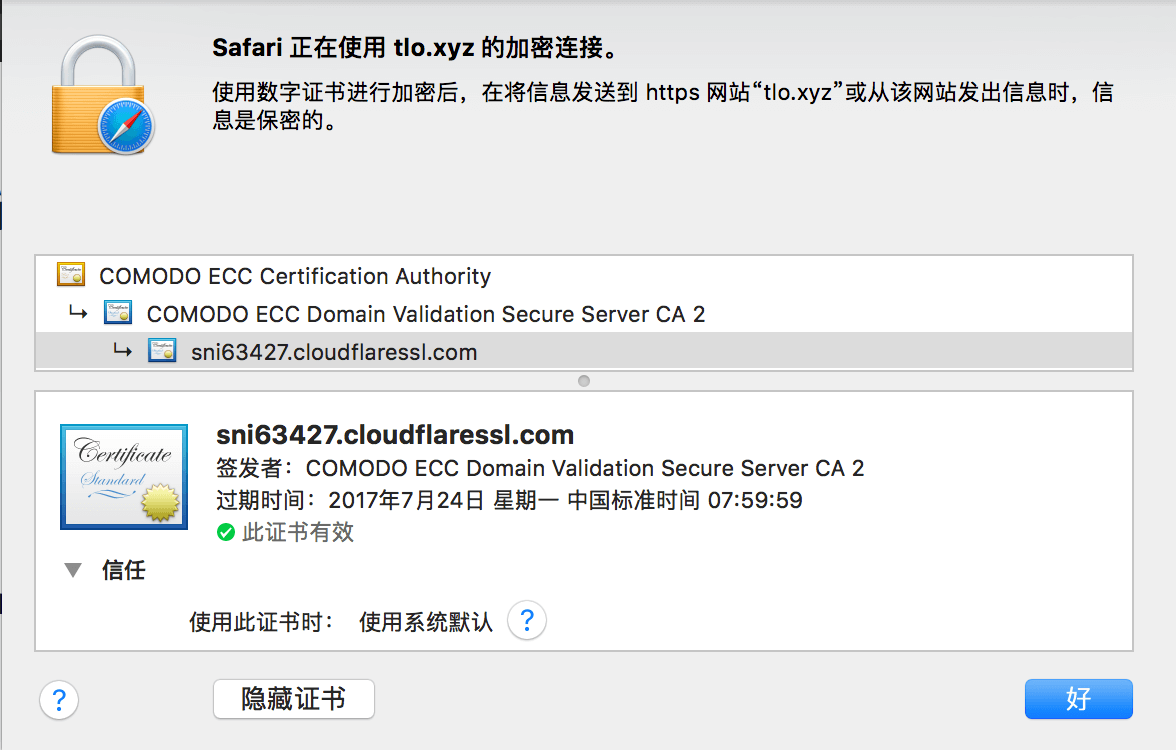
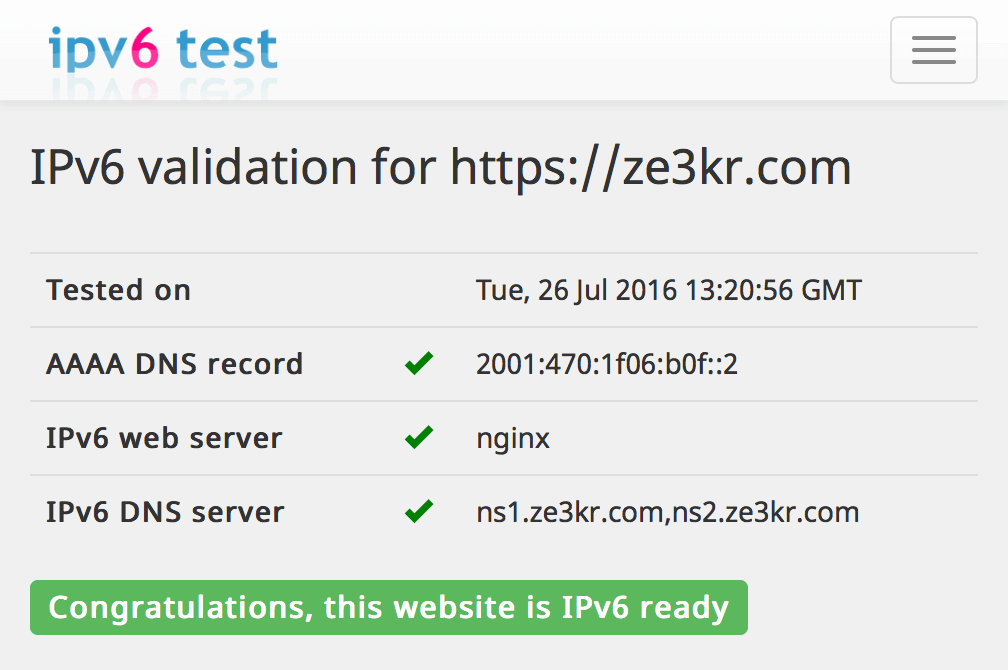
If you try to access both domains with a browser, you will get a certificate error report because I haven’t issued a certificate for this domain.
Advanced
This article and the unpublished “Detailed Explanation of Domain Name Resolution System (DNS) - DNSSEC” have been selected into “Knock on the Door of the Internet World“
]]>


 ]]>
]]>


 #### Data Integrity Algorithm to Reduce the Computational Pressure of Public Key Cryptography
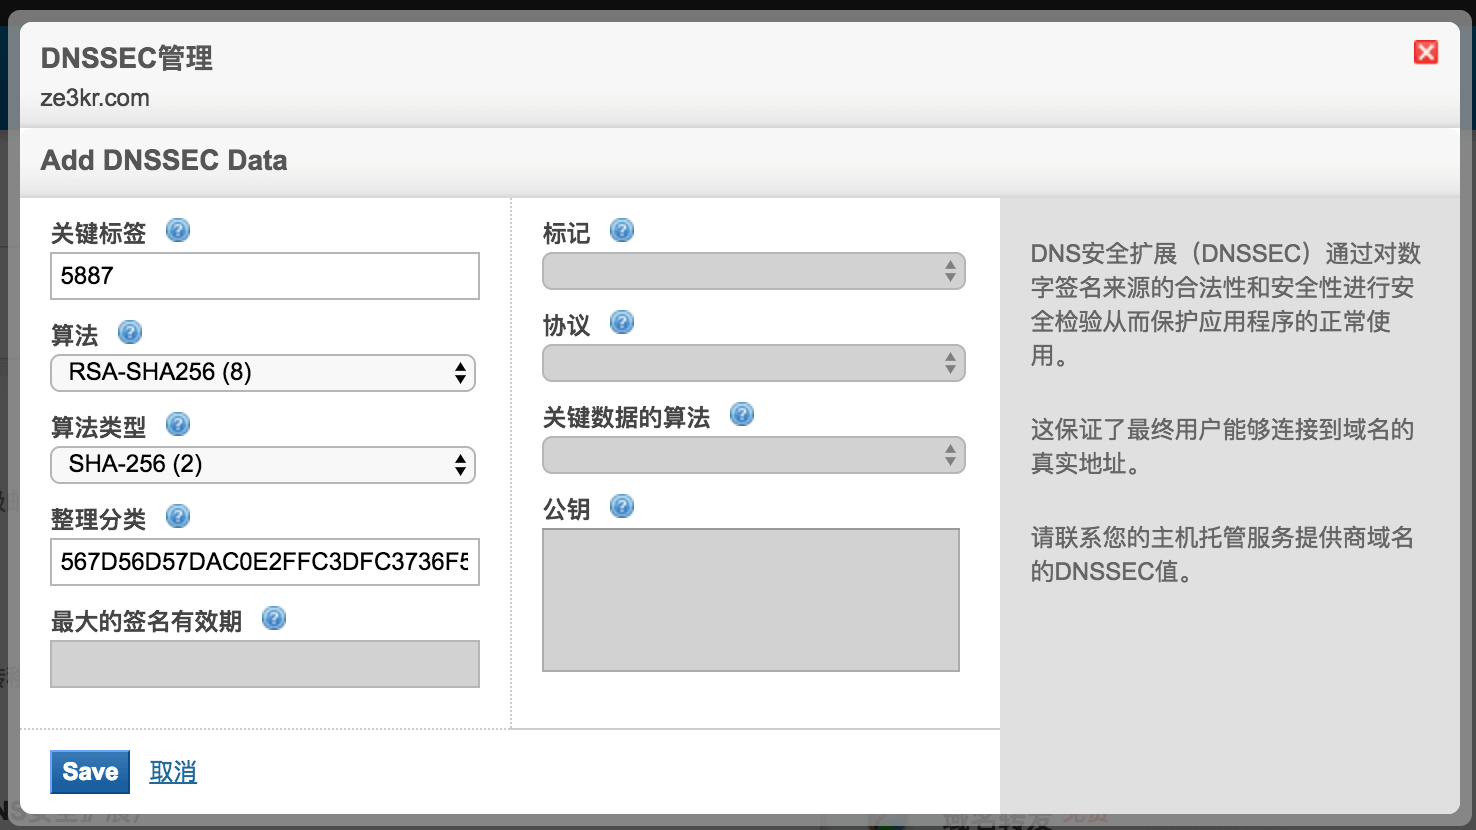


 ]]>
]]>
 ]]>
]]>